Include Process and Case Information
The E-mail setup allows you to easily include business information used in Processes and stored in the data model.
Including Data Model Information
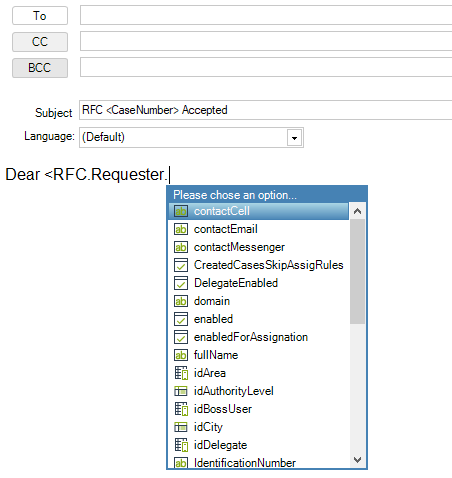
Data model information and special information can be included in the body of the email using angle brackets < >. These placeholders resolve to actual values dynamically based on the case.
Options to Include Data:
-
Navigating the Data Model:
- Indicate the path to the attribute using angle brackets.
- Type
<to trigger a dropdown list of attributes from the Process Entity and Runtime entities (e.g.,<Case>). - Navigate the model using the period (
.) to access sub-entities or related attributes.
-
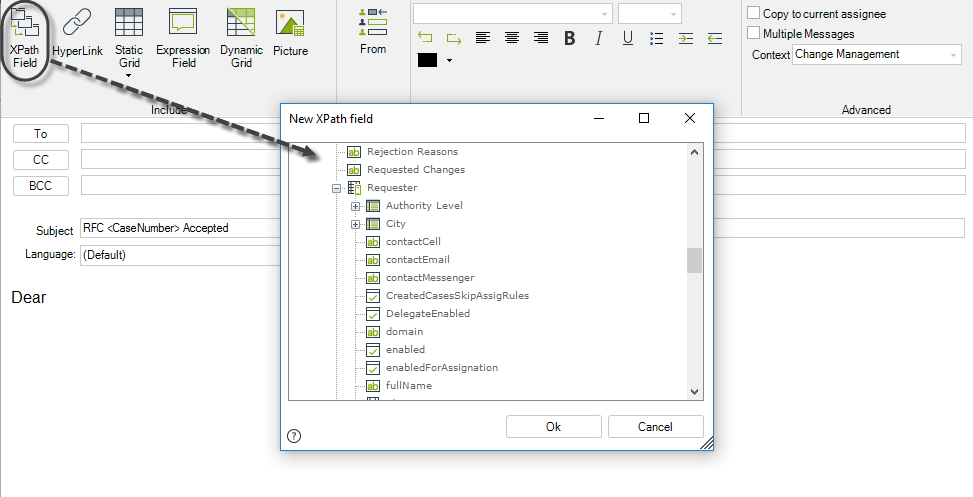
Using the XPath Field Option:
- Click the XPath Field toolbar button.
- Navigate the model and double-click the desired attribute to include it.
Notes on Currency Attributes:
To hide currency symbols in message templates, add the following key in your project configuration files:
<add key="HideCurrencySymbolOnMessageTemplate" value="true" />
When the key value is set as true, Currency attributes are considered as Float attributes, and the currency symbol is hidden from message templates. If the key is not added or its value is set as false, Currency attributes behave normally and the currency symbol is shown.
Note that this configuration applies to all messages sent from the project. It is not possible to specify which emails should display currency symbols and which not.
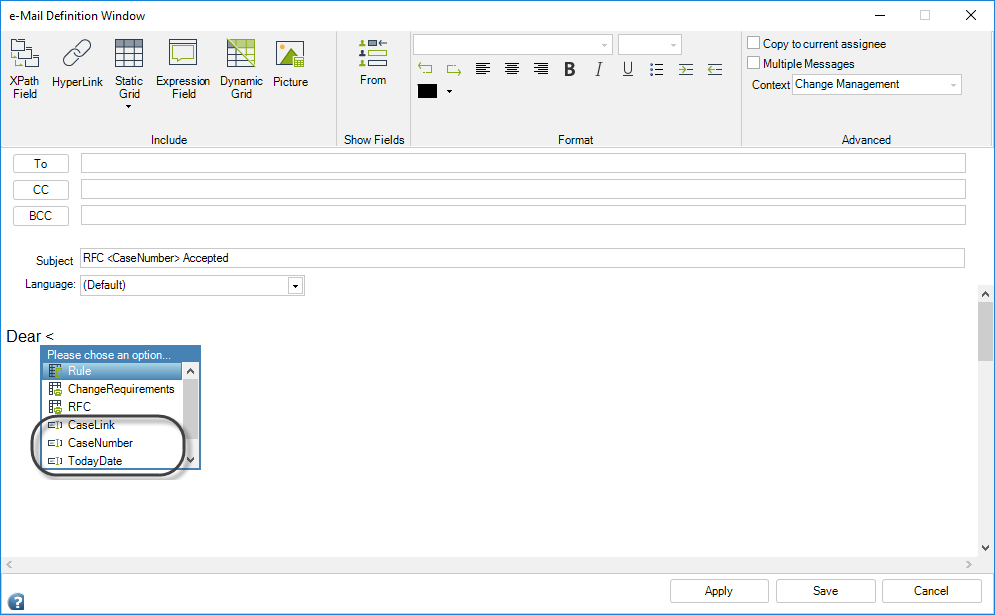
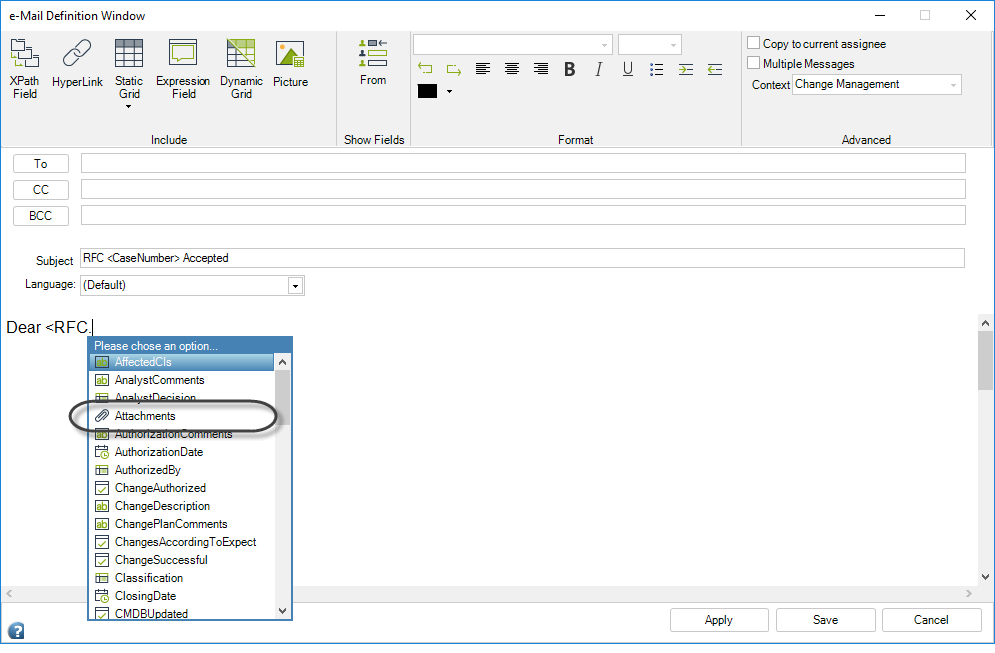
Include Special Information
You can include special information in emails without any rules or coding:
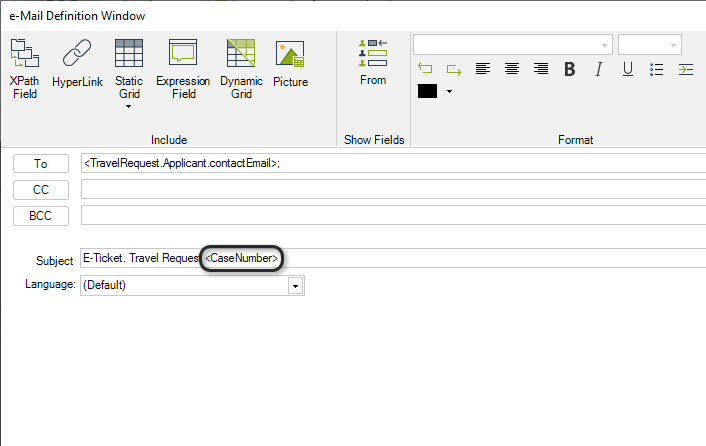
<CaseNumber>: Includes the Case Number of the case that is sending the email.<TodayDate>: Includes today’s date.<CaseLink>: Inserts a link to the case that is sending the email. This link opens the case in Bizagi's Work Portal (only for the email body).<Case>: Displays all runtime entity information related to Bizagi’s process and cases.
To include this kind of information, type the open angle bracket <. A dropdown menu will appear, allowing you to select the desired information by double-clicking on it.
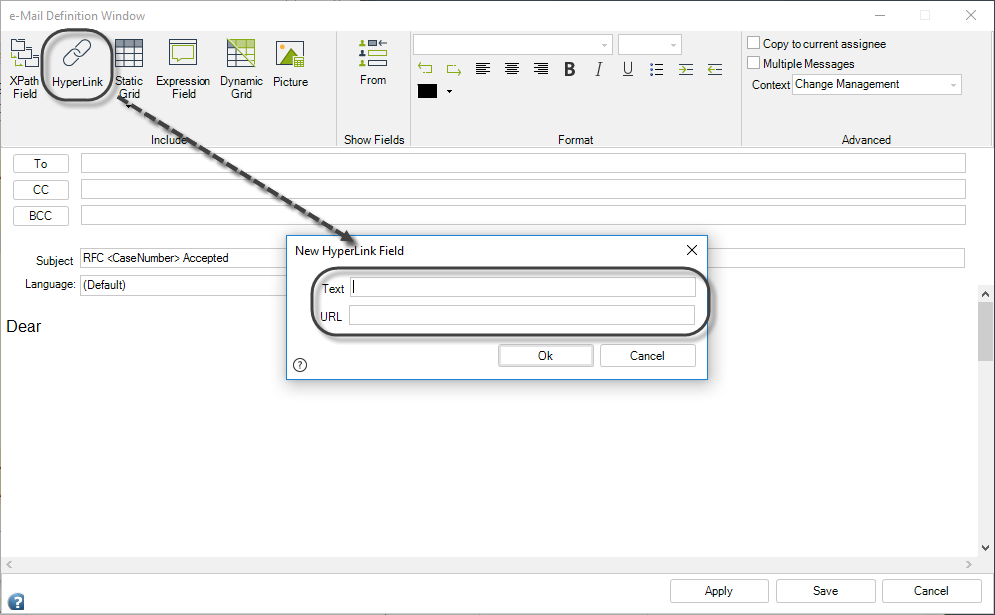
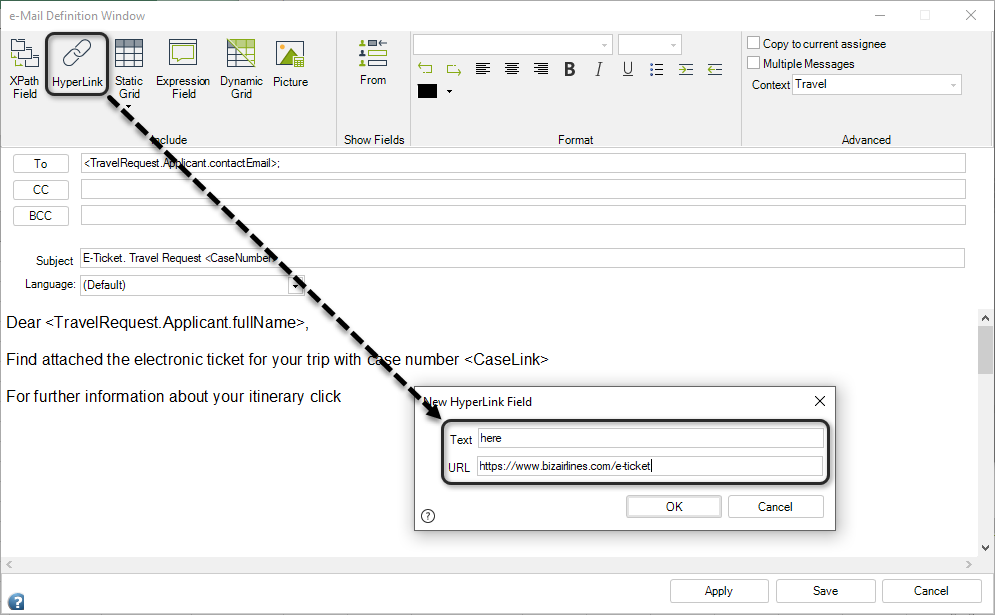
Include Hyperlinks
To add a hyperlink:
- Select HyperLink at the top of the window.
- Enter a display name in the Text field and provide the URL in the URL field.
When the recipient receives the email, the Text will appear as a hyperlink, allowing them to click and access the data.
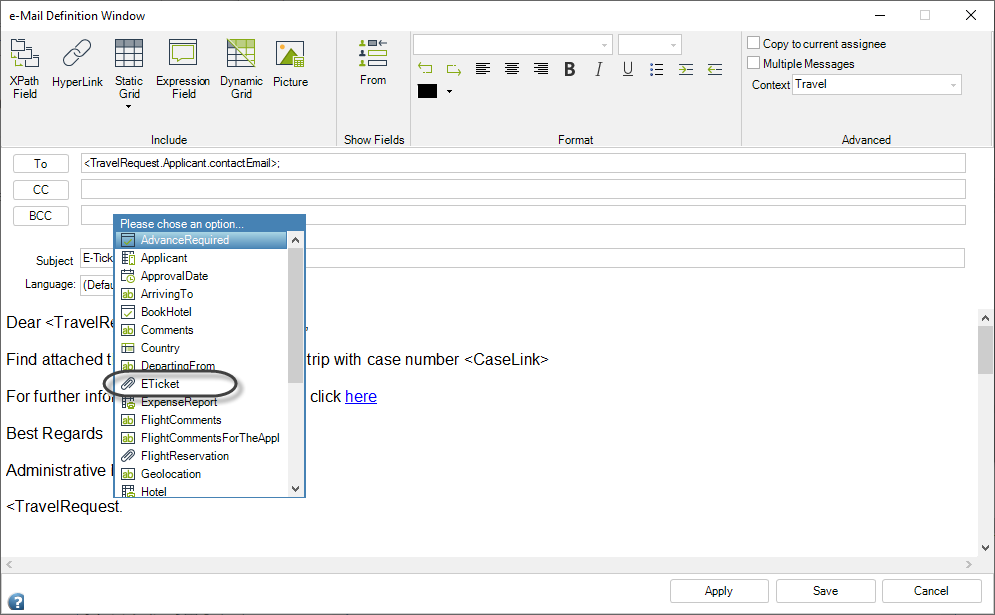
Include Uploaded Files and Document Templates
To send uploaded files or Document Templates in the email:
- Enter the XPath of the attribute containing the file (e.g.,
<FileToUpload>). - Alternatively, use the XPath Field button to select the file attribute.
The XPath can be placed anywhere in the email body, but the file or Document Template will be sent as an attachment and will not display in the email body.
If the attribute is part of a collection, you can attach all files in the collection, e.g., <Entity.Collection.FileAttribute>.
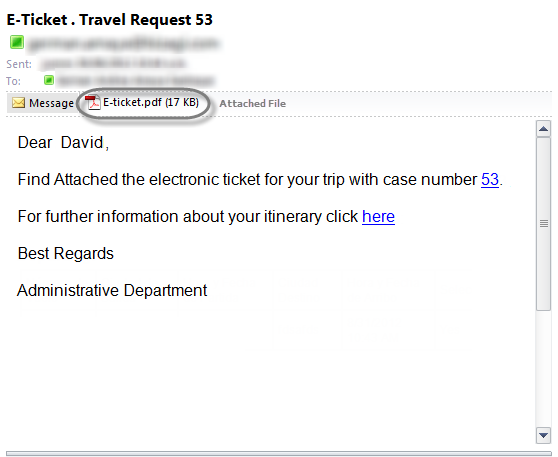
Example: Include Information in an Email
Scenario:
A Travel Request Process involves notifying employees about booking statuses. For instance, after booking flight tickets, an email is sent to the applicant with flight details and the e-ticket as an attachment.
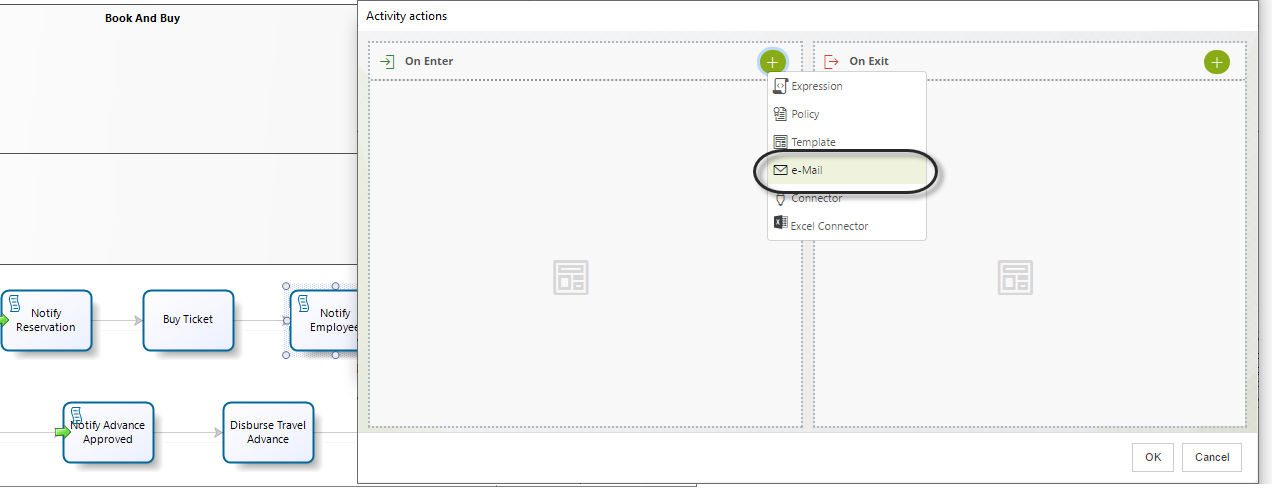
Steps to Configure:
-
Go to Activity Actions in the fourth step of the Process Wizard.
- Select the Activity where the email must be sent.
- Define an On Enter or On Exit action.
- Click Add and select the E-mail option.
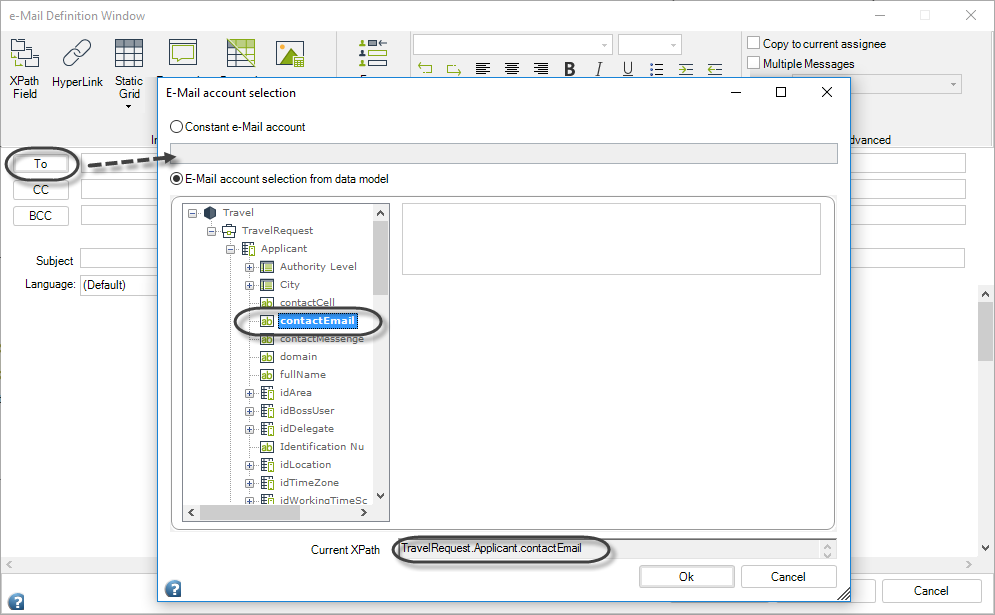
-
Select Addressees:
- Click To and navigate the entity-relationship model to find the attribute where the email address is saved.
- In this example, select the Applicant’s email address.
-
Compose the Email:
- Use
<CaseNumber>in the subject line to include the case identifier. - Use angle brackets
<>to include dynamic data, such as the Applicant’s name. - Add
<CaseLink>to include a link to the case.
- Insert airline information as a hyperlink:
- Click Hyperlink, type the display text, and provide the airline’s URL.
- Attach the e-ticket:
- Use the file attribute from the data model to include the attachment.
- Use
-
Save the configuration.
Email Example: